
More Helpful Content
Although Microsoft Excel is not a dedicated tool for inventory management, it will also be an effective temporary solution. With the ability to provide many different utilities and be easy to use. Microsoft Excel will also help you make detailed and scientific statistics. In this article, you will get instructions on how to create QR Code Inventory Management in Excel.
For QR codes, this is an added feature or value-added feature. So make sure the Internet is on because it's using the required API switch internet for creating your QR codes. The Barcode Control in Excel may assist you in easily creating QR codes based on cell values. Please do the following.
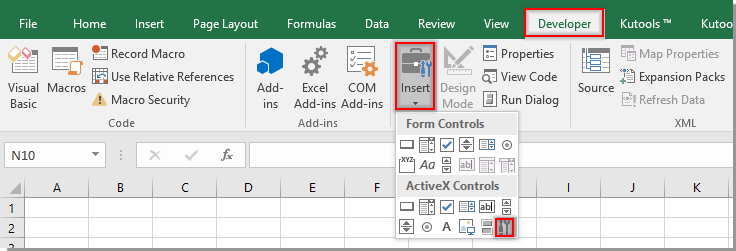
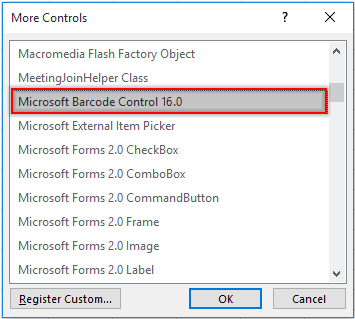
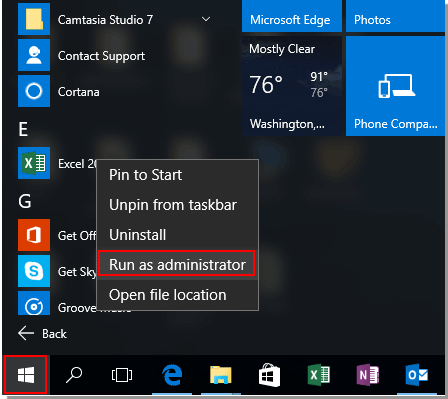
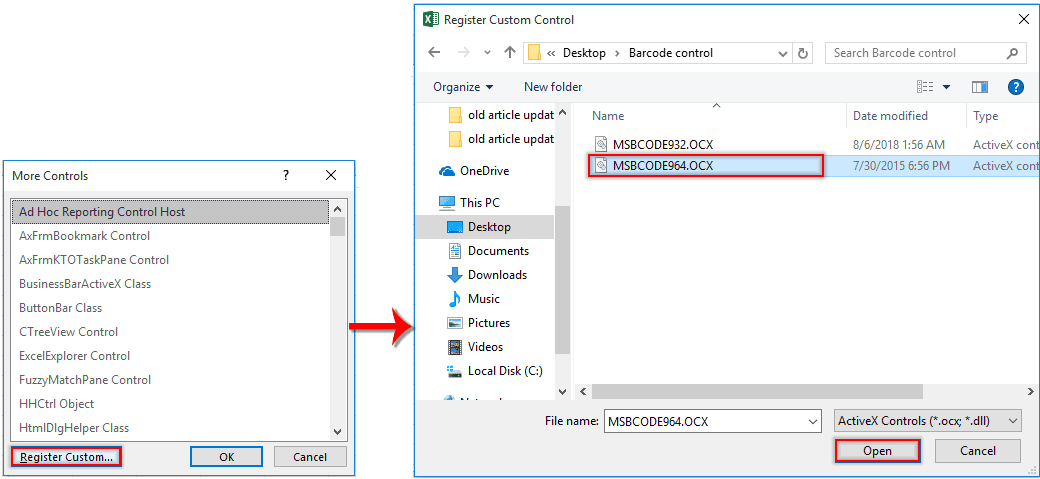
If you see Barcode Control 15.0 or 16.0 in the More Controls window, go to step 10. After downloading the file, you have to unzip it and then update the Barcode Control in Excel with the downloaded barcode control as shown below.

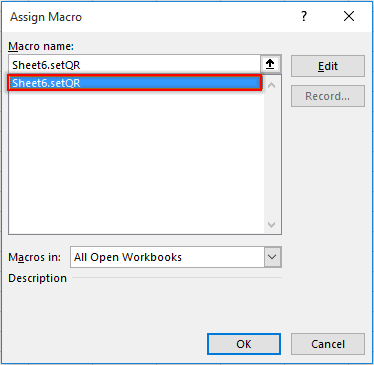
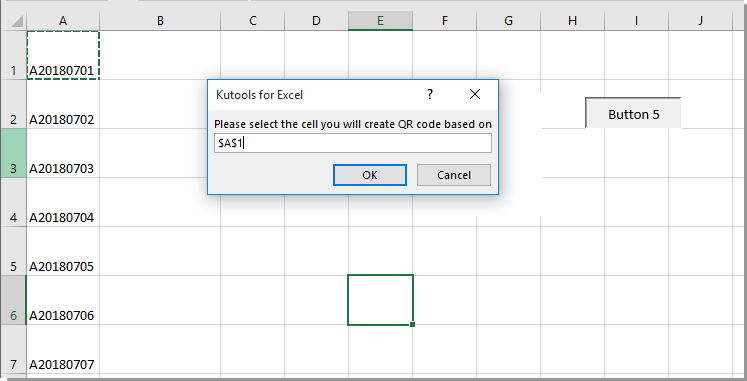

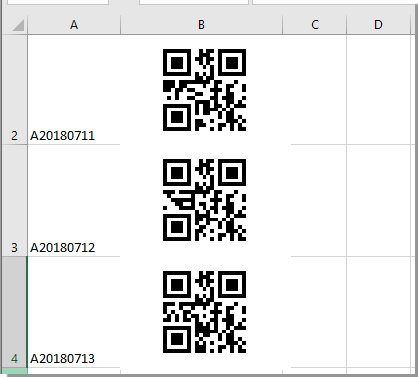
The QR Code will then be immediately placed into the desired cell. Repeat steps 14–15 until all QR codes have been produced. See the following screenshot:
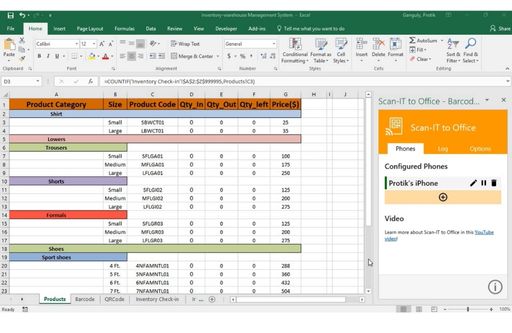
Here is a simple barcode-based inventory management system that you can set up using MS excel and your mobile phone with no costs attached. Here is a sample page with some demo products and demo product code:
👉 Read More: How Can You Disposal Of Obsolete Inventory?
👉 Read More: How To Create An SKU Number And SKU Generator
These are the main columns that will show the actual quantity when you check out a new product and your inventory count like when you check out a product from stock and the remaining quantity is the remaining quantity. back in your inventory, you can calculate your inventory cost with this number as well as you can see there are multiple pages at the bottom and for each sheet. To do this, follow these steps:
You will know its features and functions in detail, so let's move on to the barcode page so that you can generate barcodes for each of your products. You probably know that a barcode is nothing but a font, so you can download the barcode font using this link.
Make sure you write the product code between the asterisks as you can see in this recipe table. The product code is between these asterisks and then you just go to the font and change it to free 3/9 that's the name of the barcode font so this is the isa39 barcode and when you change the font, the barcode will display exactly like here and then in the QR code section, this is a value-added feature, so just make sure why you keep generating QR codes.
This process has been automated and all you have to do is go ahead and write any description of your product in the description column and you can see your product. The QR code will show up here so for each QR code we will discuss the recipe here so that if you want to create a new product category you know how to write the recipe as well as be able to do it.
👉 Read More: ABC Analysis Example, Formula, and How To Calculate
So when you can see the QR Value this is d3 color means this is the description that will show after you scan the QR code any description contained in this column will also be displayed on the phone. This is the name that is referenced to each image to identify it be unique:
We have mentioned the Scan-IT to Office to scan IT as well as mentioned the step on how to install the app and how to pair your mobile phone with the app so that your mobile phone acts as a scanner barcode. then you can go ahead and start scanning the barcode and the barcode will start appearing here in your screen. The formula automatically starts counting your inventory on the first page we saw initially with this one, so let's see how it actually works.

You will connect to your phone that will appear like this: There is a good part about this app where you can add as many mobiles as you want, such as if you have a lot of users counting inventory they can use their phones without seeing them. any problem. And then you will enter the products into the table and track them on your phone.
These tutorials have shown you how to generate QR code inventory management in Excel. What you need to do is take the time to study and follow the instructions step by step to be able to complete the job as desired. Wish you success! Do not follow us to get many more useful guides in the next posts!


